
It’s winter now and we have some demijohns of cider we made in the summer which need bottling. As I looked at them this morning, I realised I haven’t talked about making cider very much even though it’s our favourite thing to make!
As always if you search the internet, you will find many recipes for making cider from apples. The instructions will differ slightly, depending on the recipe. However the principles are generally the same. The following guide will give you an idea of what’s involved if you fancy making your own cider from scratch this year and have never done it before.
I would mention that this is quite a ‘quick and dirty’ process compared with some other, more elaborate methods out there. But it works for us every time. So why make it complicated when it doesn’t need to be?
Why make your own cider at home?
The reason customers tell us they started making cider is because either they, or a relative, have an apple tree in their garden. At some point in they year they find themselves overwhelmed with apples and have run out of ways to use them up. Rather than letting them go to waste, thoughts turn to making cider at home.
Once you’ve done it and tasted your own cider, you’ll want to make it again and again. It really is such a simple thing to make. And as well as being lovely to drink in the summer, it’s great for mulled cider and casseroles in the winter.
Do I need a press?
Preparing apples for making cider is slightly different to preparing fruit for making most wines, because you need to extract the juice from the apples.
Above you’ll see an example of a fruit press. We have one exactly like this. Available on Amazon, they work extremely well. But before you’ve charged out and invested in an apple or fruit press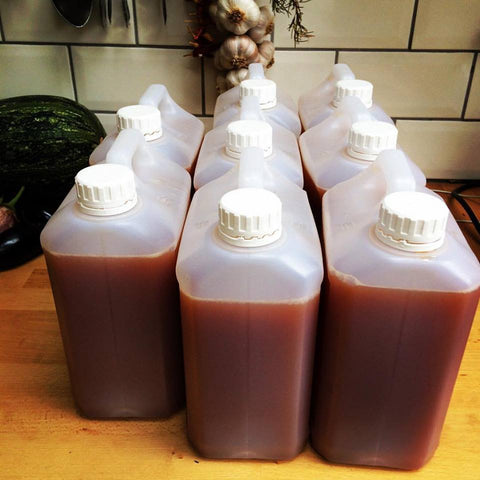 , read on to see if you could perhaps do without one this first year.
You might have a juicer kicking around in a kitchen cabinet, or someone else might, which will cope with the volume. Or you could bash the apples within an inch of their lives and then strain the juice. You don’t extract as much juice that way as using a press or juicer, but it does a job. Or you might be able to borrow/hire a press from someone else.
Paying to have your apples pressed
In our first year making cider we paid to have our apples pressed. It was a bit pricey because you were paying for someone’s time, but it was cheaper than buying a press in that first year.
Once we realised we loved making cider and we loved the cider we’d made, we stopped paying someone else to press the apples and invested in a press. This guide assumes you have just about no equipment at all.
What will I need to make cider from scratch?
At an absolute minimum, you will need:
- cleaner/steriliser
- apples
- a knife & chopping board
- a bucket (food grade)
- a fence post/potato masher/way of smashing the apples up
- a sieve
- a funnel
- muslin
- a clean tea towel
- a clean demijohn (more about sourcing glass demijohns here)
- a bung and airlock.
You’ll also need a syphon and bottles later, but you don’t need them in the beginning.
For your first time we would recommend Campden Tablets and a sachet of Cider Yeast too, but if you ‘go wild’ you won’t even need those (more about that later).
(If you have no equipment at all and want to get going, we have put together a Basic Cider Kit which includes a plastic PET demijohn with bored cap, airlock, syphon, yeast, campden tablets and steriliser. So the only other thing you would need would be bottles, a small amount of sugar for carbonation when you bottle and, of course, apple juice.)
How many Apples do I need?
If you’re aiming to make one demijohn of cider, a demijohn takes 4.5 litres (1 gallon) of liquid. As a general rule you will need about of 9 kg (20 lbs) of apples to produce 4.5 litres of juice. Bear in mind if you’re smashing rather than juicing, you may need a few more apples. The less sophisticated the method of juice extraction, the less juice you will be able to extract and therefore the more apples you will need.
Can I just make Cider from the juice and add nothing else?
Yes you can. There are some caveats to that though. There are essentially 2 simple ways to make cider.
One is to add campden tablets to the juice to remove any bad bacterial that may spoil the whole batch. Then 24 hours later, add cider yeast.Whichever way to make your cider though, you must sterilise the equipment.
Will my Cider taste the same every time I make it?
Like making wine from scratch, cider batches never tend to turn out quite the same each time, even if you follow the recipe to the letter.
We put that down to how much sugar there is in the apples depending on how ripe they are, or perhaps the temperature at the time that you’re making it. However if you go down the campden and yeast route, it is more likely to taste similar each year assuming you’re using the same apples.
1. Clean and sterilise
It’s the same old thing that we’re always banging on about, but that’s because it’s important and we really can’t stress it strongly enough. You must clean & sterilise all equipment that will come into contact with your cider.
Fermenting liquids are an ideal breeding ground for bacteria, and unwanted bacteria will spoil your finished product.
2. Wash, chop and juice your apples
I stand at the kitchen counter and chop them very roughly, cutting out the very obvious bad bits and insects. There is no need to be too precious about it though, because it’ll all come out in the wash. If you don’t have access to a press, then you’ll be extracting the juice by less effective means (like smashing them in a bucket with a fence post).
3. Strain your apple juice and pour it into the demijohn
Pour juice into demijohn to just below the ‘shoulders’ of the demijohn. Too full and you could have an overflowing mess on your hands later. However oxygen could spoil your cider so you don’t want a large gap between the juice and the neck of the demijohn either.
If the apples don’t make enough juice to fill the demijohn up to the shoulders, top up the liquid using either pressed apple juice that you’ve bought from the shop (fresh rather than from concentrate), or with water that you’ve boiled and then allowed to go cold.
4. Add a campden tablet and leave for 24 hours
Crush a campden tablet with the back of a spoon, put it in the demijohn, swirl it around. Leave for 24 hours.
You can cover it with a clean tea towel or cheesecloth to keep the fruit flies out, but don’t seal it yet. If you’re interested in why that is, you’ll find more about this in my post about why fermentation can sometimes be reluctant to start.
5. Add yeast
24 hours later, sprinkle the packet of yeast over the surface of the juice in the demijohn and swirl it around again. Don’t do it earlier than 24 hours because the campden may kill the yeast if you don’t leave it long enough.
If you’re making more than one demijohn, you can share the yeast around (a sachet is more than you need for one demijohn, though adding too much – like the whole sachet in one demijohn – is not a problem).
6. Fit the sterilised airlock and bung and leave to ferment.
Pour some cold water into your airlock. Then push the bung into the demijohn and push the airlock into the hole in the bung. Put the cap on top of the airlock. And then you wait.

It will start fermenting at some point – if the room is warm, it will start more quickly and could be more vigorous. We have found the most vigorous fermentations have happened when we’ve gone ‘wild’ and the natural yeasts get to do their own thing.
For that reason you might want to put your demijohn on a tray to catch any overflow, and not stand it next to your purest white wall. Don’t ask me how I know this.
We usually find that the fermentation stops after about 4 weeks, give or take. Fermentation is the process of the yeast turning sugar into alcohol. The more sugar in the juice, the more sugar there is to turn into alcohol. So the longer it will take to ferment, and the stronger your final cider will be.
If the room is warm, the process will be a bit quicker. If the room is cool, it will take a bit longer.
A warm room at the beginning is advisable to get it going, but not directly next to heat source like a radiator (high temperatures kill yeast). If your cider stops bubbling before you’re ready to bottle it, no problem. Provided you leave the airlock and bung in position so no air can get in, the cider will happily wait until you’re ready.
We’ve been known to take weeks, even months, before we bottle cider that’s stopped bubbling. It will happily wait for you if you leave it alone, and may even be clearer than if you’d bottled it earlier.
7. Bottle, add sugar and leave to carbonate.
The final step in this process will be bottling the cider once the fermentation has completely stopped. This could be a month later or many months later, depending on the circumstances. For that you will need some plastic tubing, and vessels in which to store your cider.
We re-use old glass beer bottles; if you’re going to do that you’ll need a capper and bottle tops. So it’s probably easier and cheaper to get some PET beer bottles with screw caps.
The least cost route will be old fizzy drinks bottles, re-using their screw caps. You won’t impress your friends, but you won’t have to buy anything either.
If you want sparkly cider, you’ll need some granulated sugar which you probably have in your kitchen already. You will be adding about one teaspoonful per bottle before you screw the caps on.
People say that, when it comes to cider: make it in October, it will be alcohol by Christmas, bearable by Easter and drinkable by summer. The longer you can bear to leave it, the better it gets!
This post contains links to our webshop and/or affiliate links to other shops. If you click on them, I may make a small commission at no extra cost to you. Find our disclosure policy here.
